April 2, 2023


Today we get to welcome Sharon onto the blog today

with two beautiful layouts using the Storybook Collection papers


Sharon Himmighofer 


Sharon Himmighofer @ Vintage Book Décor              

Double Layout – using these beautiful Day Dream Papers The colour has come through darker on the finished pages, but it is more the grey colour as below.

Starting with the first Layout -


Select a delicate stencil using gesso or white paint to add some softness and dimension on the page.


  Using the Denise Boddey Die – Deco half circle, cut two using gold cardstock. Saving the little pieces to use as decorative little leaves on your page.


 Select a piece of desired chipboard, paint with a Lavender shade and glue to paper.


  Attach adhesive tape to the back and front of the die cuts and place under your selected photo, view photo below as a guide.


 I have used an extra sheet of paper to fussy cut more flowers, leaves and a crown. I used foam tape for all my photos and fussy cut images.


 Add your fussy cut flowers to the top right corner of your main photo, using a split pin add a metal word (optional) into the crown and glue down.


 Using a very light white lace gather and tuck under these flowers and glue down.


 I added rose gold glitter glue to the crown, just to add character. I used the little pink pearls in the centre of the flowers with glossy accents.
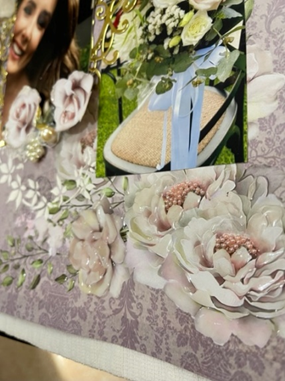

I finished the flowers with glossy accents and added some on the leaves. Looking at the finished page I have added some pearls from my stash to the bottom of the main featured photo (optional)


To finish the top left side, I added more fussy cut flowers and leaves. I added 2 white flowers, any you have will be fine. I added dimension letting the leaves drape into the white flowers. I added the Fairytale word with foam tape and just added some gloss accents to the letter F. I tucked a heart embellishment under my fussy cut flowers.


Now for Layout Page 2


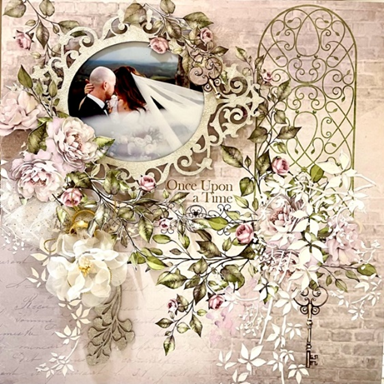
Once again I used another sheet for fussy cutting, I love the leaves on this page, flowing and soft.


 I also used the same stencil just letting the leaves flow down the page.


I used an oval chipboard, white paint and embossed using a luxurious sparkle. I also used a little chipboard leaf, emboss for later.


Add your photo and position at the top left side, add your frame using foam tape. I decorated the frame with the fussy cut roses and flowers. Add your leaves trailing downwards and only glue a few down.


 Gather some tulle with a dab of hot glue and place under the flowers at the bottom of the frame.                                                                           


 I added two Wedding Rings which I purchased from a cheap shop. I tied the rings together with some gold twine, tie a bow and leave the rest to place between the leaves. Just tuck them under the leaves.


 I placed one white flower at the end of the rings, allow your leaves to spread over this flower and finally you can tuck the embossed chipboard leaves under the flower as per photo.


 Add glossy accents to some leaves and roses.


 I added more glossy accents to place my little pink pearls inside the flowers and finished with adding more glossy accents to a few flowers near the tulle. 

Thank you for viewing and happy crafting.

here is a link to Sharon's Facebook page drop on by for some more inspiration

Vintage Book Décor


March 26, 2023

My heart is full

 Hope this post finds you all well we have been very busy of late creating and just working it. Autumm is here and the interesting weather has arrived have had the opportunity to spend time outside in my garden, Autum planting complete already for the winter rain, knowing that come spring will be a delight.

 Today we welcome Debra to the blog for the first time with her stunning layout of herself with her daughter. Such a burst of flowers in this gorgeous project


 I used the beautiful Elegance Collection papers, which I have fussy cut, torn , inked and layered.

My photo is mounted on a fancy chipboard frame.
I embossed the leafy chipboard pieces and tucked them under the flowers I have added. 


I have added more texture to the layout using texture paste through a stencil, then added some Artstone for added detail.


The printed flowers on the paper I have glued gold microbeads for the flower centers so that the flowers pop.


Thank you Debra for sharing this special page with us


 thanks for the visit to our blog

March 12, 2023

Love Gauge

 Hope you are well this Sunday and the week gone has treated you nicely.

Today we get to welcome for the first time on the blog Sonia 


This month I have used.  Guage Large, to make two 3D Gauges.

The first one (purple) I painted all the pieces with purple paint and then silver embossed front and back circle and top of gauge piece. 

The paper used was from the Story Book Collection to create an interest on the front of the gauge. I cut a half circle from the Daydream paper using the small roses and leaves as my feature. 

From that same paper I covered the lower front section of the gauge and then ran it through an embossing folder which I had inked to create the texture. 

I used a small piece of paper from In A Castle (green side) and adhered that to the hole in the bottom section that was embossed. I added purple wax to the gauge pointer to make a deeper purple colour.


 Bling in the centre and an upholstery pin (I cut of the back of it), was also added to the front of the gauge. 

Finally to finish the front of I added 3 flowers so I had something to adhere the bee to. I love Bees and would normally do a Bumble Bee yellow stripped body. For this card I decided to do a Blue Banded Bee for something different.

As I did not want to put this gauge on a card front I made my own stand so I could stand the gauge up. Then I white embossed the square snowflake from Snowflake 3 chipboard and proceeded to decorate with flowers, leaves and a sentiment. I personal would love to give this to a special friend.


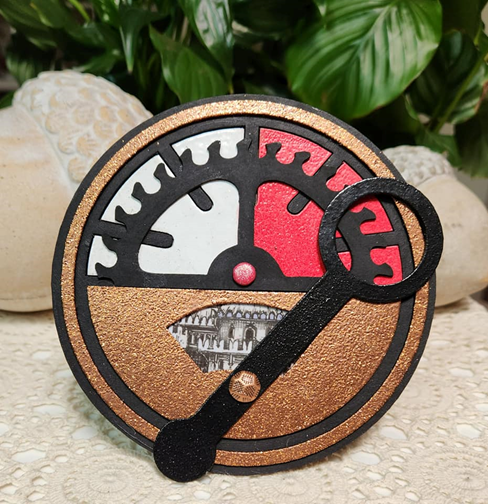
The second gauge I made was more aligned for giving to a male. 

The embossing was a copper glitter powder and I white and red embossed behind the gauge and added this extra piece in.

 Once again from the Story Book Collection, paper Chapters I cut out a piece of the black and white castle to put behind the bottom curved hole and I also cleared embossed it. Another upholstery pin was added and a brad to finish off the front.

Once again I made a stand and decorated the back using Steampunk Keys chipboard and a heart from Angel wings Petite. Wings of key painted a dark grey and all other pieces embossed.


thankyou Sonia for two awesome projects 
and thanks for the visit to our blog


March 7, 2023

A Dog's day

Today Iam sharing Tina's  rustic page layout she has created all about her and her dogs adventures
love the paw prints throughout. 


 I started with various chipboard including hat works and steam punk elements


I painted them with black gesso and then used various Finnaber waxes.


I then took the time warp paper and added some dog footprint embossing.  
I then layered various papers behind my photo. I then layered up the chipboard around my photo. 
I added some 49 and market bits from a sticker sheet. 
I added some splatters in black, white and teal. 
I then felt it needed something. so I ripped 3 pieces from the border and added some overcast behind these pieces and some staples. 


Thank you for looking and I hope you have a crafty day!
thank you Tina for sharing your fun layout 


February 27, 2023

4 Cogs of Time

Hope this post finds you all well Today we get to  welcome back for the first time this year Theresa

Theresa has created a fantastic set of cards
showcasing The Cogs of Time Collection

Hi everyone and welcome to 2023

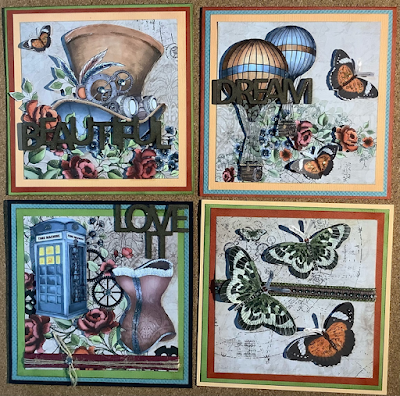
Today I have a lovely set of four cards using the New Cogs Of Time paper collection for you to be inspired by


To create these cards I have made my own card bases by cutting 2 matching pieces of cardstock

1 @ 6 “and the other at 6 ½”

You then score the 6 ½” piece @ ½” and fold

This piece is then stuck using tape and glue to the 6” piece creating a 6” square card


    I have found some card stock to match the colours of the paper collection and have cut these in the following sizes to create the layers for the cards


5 ¾” and 5 ½”

The main image for each card front is cut at 5 “ and I have used the Time Tunnel paper


All the edges of my card stock are inked with Distress inks in Crackling Campfire, Peeled Paint, Antique Linen and Speckled Egg Do add the depth to my cards I have fussy cut another piece of the Time Tunnel paper so I can 3D mount these images over the others

 this card has a DB Chipboard 378 Hashtags clear embossed


 this card has 2 ribbons layered on each other then a strip of rhinestones


 this card has another clear embossed DB 378 Hashtag chipboard piece


 this card has ribbon with twine tied on it and an embossed DB 378 Hashtag chipboard title 

All the cards have then been finished off with Nuvo Glitter Drops in Gold Coast colour and Glossy Accents

Have fun creating

Theresa Kamp

thanks for vising

Denise