May 29, 2021

Unsaid things about Inks

Basic knowledge

I posted this tutorial in 2010 I have done an updated version tonight after a question in class today. Things everyone thinks you should know and takes for granted, but forgets to tell anyone when starting. Then you are afraid to ask for the fear of seeming dumb.
So I have put together a little explanation to try and help, of course there are variations out there which will contradict, and new products constantly coming available changing the way we are creating and forming different techniques thus effecting what ink we will need. This is a simple guide to help you make the right choice with the inks you choose to use,
basically what surface and technique determines what ink. Does your ink have one or more of the following in it Water based, Oil Based or Solvent Based, these characteristics are important key factors to achieving the end result you are aiming for in your project. I however have not even touched on all the other tools and mediums that can be used with your inks but they too have a basic rule, water, oil or Solvent/Alcohol. This is only a basic guide as there now are many different brands which have been developed by many different companies. Speaking from experience always be careful of what you clean your polymer and rubber stamps with always a clean cloth with no oils and solvents in it. I do not recommend using tissues or baby wipes because they can contain oil (Aloe-Vera) great for our skin but not for our stamps, there are special cleaners for special inks and stamps. Avoid using stazz-on cleaner on your polymer stamps as well as Staz-on ink.  Always make sure you clean your stamps going from memento ink to Staz-on this can cause cross contamination of inks ruining an ink pad, and always clean your stamps before stamping with a different colour ink. 

Hope this helps you happy crafting.


Pigment ink
Pigment ink is a slow drying ink commonly used for wet embossing, is acid free and fade resistant. Pigment ink can be used without embossing as long it is given adequate time to dry, can be improved using a heat gun to set the ink

Versafine (Tsukineko Brand) Is a quick drying natural oil-based opaque pigment ink dries very quickly on matte cardstock, providing incredibly fine detail. You are able to watercolour markers over the stamped images and it won't bleed. Recommended ink to use with your clear polymer stamps.


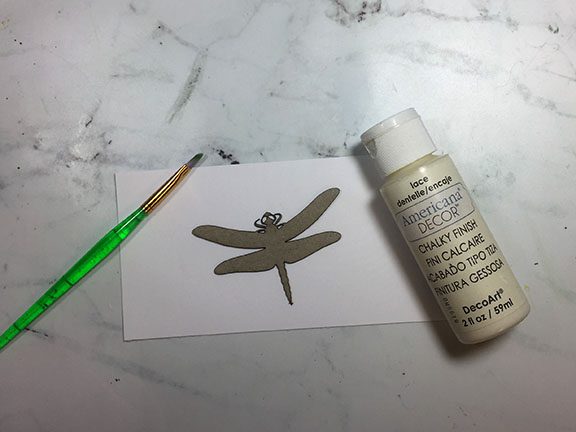
Chalk inks Versamagic (Tsukineko Brand)
Chalk inks are a water based  
opaque pigment ink that dries quickly into a delicate chalky finish, giving a rich saturated opaque result. Chalk ink cannot be wet embossed. It is acid free is resistant to smearing, bleeding and fading. Works well on dark card stock for a strong result as well on glossy surfaces.


Dye ink
Dye ink pads are a water based quick drying, acid free ink which will
absorb into the paper. Can be permanent and sometimes waterproof if indicated on label of the pad. The ink may run if it gets wet with water this is used as a technique for texture and opacity. Dye ink cannot be embossed unless you add a clear embossing ink to it. Dye ink is used for distressing with distressing blocks also combined with blender pens or aqua painters is great for colouring instead of markers.

Archival Dye Ink (Ranger Brand) Archival ink is a fade resistant, waterproof, nontoxic and acid-free, ink. Providing a long-lasting crisp image. It will not bleed when using water based markers, blenders, pigments or coloured pencils, heat setting with a heat gun is recommended to ensure permanency when stamped on glossy surfaces

Memento is a fade resistant Dye Ink that is the preferred ink to use with your Copic/Alcohol Markers. When dry your stamp image will not smear with the use of Alcohol markers when are applied over them


Distress Oxide® Ink

It is a water-reactive dye & pigment ink fusion that creates an oxidized effect when sprayed with water. The ink is thick and opaque dries very slowly sometimes never on a gloss service. The ink is not permanent and will continue to react whenever it comes into contact with water it is not water-resistant


Stazz on ink
Stazz on ink is a solvent based ink that can be stamped on most surfaces the result is a permanent waterproof stamped image. Use on outlined stamped images if using aqua painter or blender pens, cannot be embossed or distressed as the ink will dry on the stamp if not used immediately. To remove ink from the stamps a special cleaner needs to be used


May 18, 2021

Dragon Fly pin

 today is Janet's turn on the Blog

This image has an empty alt attribute; its file name is dragonflypintitle.jpg

Follow along as I make this adorable Dragonfly Pin using a chipboard design piece from Denise Boddey Designs. This post is created as a part of the design team and some materials have been provided to use in this post. You can make your pin in different colors if you wish. Make one match a special outfit or for a special occasion. The Dragonfly Pin would also make a great gift or an embellishment for a card or mixed media project.

This image has an empty alt attribute; its file name is whitepaint.jpg

white paint

Since the chipboard is dark, I used white chalk paint to coat the dragonfly. I found it needed two coats to fully cover the piece. Now the colors will show up better.

paint colors

This image has an empty alt attribute; its file name is paints.jpg


May 17, 2021

Layered Elegant page

 Hello everyone, I'm back with another project using the latest release products from Denise Boddey. Have you checked the new release ? If not, please follow the link below latest collection.

How to:

  • I painted my chipboard with white acrylic paint or you can use gesso too.
  • Then I arranged the painted chipboard around the photos using glue
  • Fussy cut the Elegance Collection box packs and layered them one above the other
Materials Used:


May 16, 2021

Elegant Layout

  The Elegance Collection


Hello everyone, Leanne here with you today and I have a design team post to share using the latest collection of patterned papers and chipboard called Elegance.


I have embellished my layout with hand dyed lace trim, paper flowers and a large rhinestone.


To decorate the chipboard I have used water colour paints, iridescent medium and gold metallic wax.
I have also stamped a sentiment in the center of one of the chipboard pieces.  

I have used the following products:
Chipboard: 
                   Blue Bells
                   Botanicals 
                   Elegance doily

Elegance patterned paper: 
                                           Chic
                                           Grace
Thank you for looking,
Leanne

April 16, 2021

Design team

 I have been a little behind of late so today I will share some of the two posts from our design team members

Ashley

Hi friends! Ashley here today sharing a scrapbookg page of my nephew! I used some new patterned papers from Denise Boddey Designs.

I love the watercolor background look of the After the Rain patterned paper. So pretty! I applied gesso + Shimmerz to create my own mixed media design as a mat for my photos. I wanted it to blend and coordinate with the pattern paper background. I used the Chic patterned paper to mat my photos. After that was dry, I grabbed the mini brick stencil from TCW to add some more interest behind my photos. I mixed Shimmerz Keep Palm with some opaque texture paste from Ranger. Then I just added some embellishments from my stash!

This page is going in my nephew's album. Thanks for looking!


Janet


Today I am posting as a part of the Denise Boddey Design Team. I am working with cut chipboard and a card topper. Painting and layering the elements make for a beautiful work of art. Framing mine, I used a frame from the dollar store that I did a patina finish on to coordinate the colors.

Materials:

  • Card topper (In my Garden Patch)
  • Chipboard (Arch Window)
  • detail scissors
  • Americana Chalk Finish (lace)
  • tape runner
  • glue
  • picture frame
  • Metal Effects patina kit
  • foam brush


Follow along with the video tutorial:

video link: https://youtu.be/84NNI8rvbow

thanks girls for your great projects

and thanks for visiting

March 20, 2021

Delightful album


Ramya has a album and has used our chipboard in it

Hi everyone ! It's Ramya here today and I'm happy to share this mixed media album 

How to:
  • I painted my chipboard with white acrylic paint or you can use gesso too.
  • Then I arranged the painted chipboard around the photos using glue
  • I placed my stickers one above the other around the photos
Materials Used:

March 10, 2021

Bright and Cheery Album cover


Hello friends! It’s Aya once again and for another project using Denise chipboard designs
 I do not make albums that much, but since my husband gifted me a photo album, I decided to fill it with our photos. 

Here are some photos of the album cover


To cover the album, I used stencil and modeling paste. Next, I added grass and paper flowers. Finally, I added the chipboard designs in front and back.

I hope you got inspired to try making this into a shaker card using chipboard


February 27, 2021

Dancing Shoes

 Hello everyone,

Today we have Leanne sharing with you her lovely layout she has created .


My layout has lots of different embellishments from paper flowers, pearl trim & self-adhesive pearls, gold jewels and punched out tiny butterflies and leaves.

Chipboard pieces used are: Ballet shoes
                                                Baby tears foliage


All of the chipboard pieces have been painted using an acrylic paint. Each piece was then finished with some metallic wax that was added to highlight the edges of the painted chipboard.


Thank you for looking.
Leanne

January 23, 2021

In Loving Memory

 Hello everyone & welcome!

My first design team post for Denise Boddey designs for 2021 is dedicated to my dear dad who sadly passed away in December 2020. 

This gorgeous photo is of my mum and dad on their wedding day.


My project's frame is from an old clock. Rather then throwing it away I decided to use it as a shadow box. I love to reuse and repurpose items when I can. 


The chipboard piece I chose is called Vienna Flourish Rectangle.
I love this piece as it has the perfect vintage flair.  


To create the desired effect I first had to cut the chipboard piece in half. This allowed me to frame my photo. I then used Antique white acrylic paint to paint each piece. When dry I added some metallic wax to highlight some areas.


Patterned papers and photo were then added to the chipboard pieces.


Next I cut a circle to fit inside the frame - patterned papers are from the Pion design range called Vintage Wedding. Just so perfect!!! 
I then set about fussy cutting out some of the rose designs and arranged them in place before adhering each piece to the circle shape.


Layers of 3D foam tape were added to the whole photo piece before adhering in place as shown.
To finish I have fixed in place some paper roses, pearls, gold wedding bands and fussy cut butterflies.


Here is the completed project, now with the glass insert and outer black frame. JUST PERFECT!

Leanne


January 3, 2021

Faux Stained Glass

Happy New Year

Today we are going to share a project Janet made last year

 Making Faux Stained Glass 

Looking at these Sprouts Panels from Denise Boddey Designs, I thought they would work well sandwiched together. Then I needed to decide what to put between them. Could I make faux stained glass with alcohol ink? Why not give it a try!


Materials:

  • Sprouts Panels
  • white acrylic paint
  • paintbrush
  • laminate and laminator
  • alcohol ink
  • dust cleaner
  • adhesive
  • twine
  • scissors
  • knife blade
  • Kamar Varnish
  • Clear Glaze


Here is a close-up of the finished project. I love how the colors blend together and show through the chipboard piece. Because the chipboard is laser cut, they align perfectly.

The whole finished piece with light shining through. I can't wait to hang this in a window. I think it turned out so nice.

Try it - Like it - Create it