
Good Morning
Hope your Sunday is not too busy.
Perfect day today to be inspired with winter showing us what it is all about.
We will be staying in today and crafting for sure
today we welcome Julie back with another inspirational album.

Hi there
Today's post is a mini album I created using Denise Boddey's
Day Dream Story Book paper range.
I have a video that I will add at the bottom of this post.
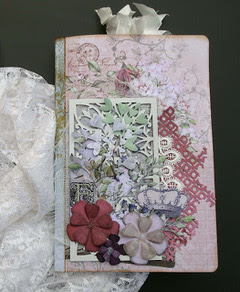
To create this album you need 4 sheets of 12" x 12" patterned paper.
The paper I have used is double sided.
If you make this album you could add as many pages as you wish
For each page:-
score at 6" with the paper right way up,
flip to the left and score at 9" (this will be at the bottom of the page)
Select the paper you want for the front cover,
use glue to attach the back outside panel of this paper to the front outside of the next panel.
Continue doing this until all pages are attached.
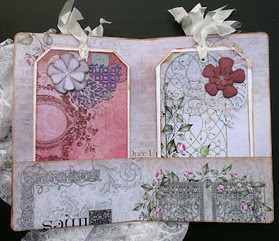
If you prefer you could only glue around the edges of each page and create pockets between each page.
I cut a piece of patterned paper 1" x 9" to create the spine cover.
Next I used my corner rounder on the top and bottom outside edges of each page.
Run a small bead of glue along the outside edges of the pocket on each page.
You could run glue along the center fold too if you prefer.
I used Vintage Photo Distress Ink and my distressing tool to ink around the edges
of each page and pocket edges
I created eight tags to go into the pockets.
I used 300gsm white cardstock to create the tags, they measure 4 1/2" x 8 1/2".
The patterned paper has been cut to 4 1/4" x 8 1/4".
I inked the edges and attached the patterned paper to the front of the tag.
I added and eyelet to the top of each tag using my Crop O Dial and
added some white seam binding through the eyelet.
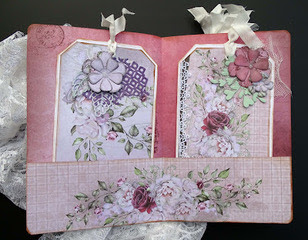


I created flowers using patterned paper and pale pink velum and my Couture Creations CO724161 die.
I cut some leaves using Honey Bee's Lovely Layers Heart Vine and Uniquely Creative Little Leaves dies
Using Uniquely Creative Island Texture die and the same papers/velum I cut some background fillers
Other embellishments I used were lace and gauze/cheese cloth and Ali Lattice chipboard panel
You will see the embellishing in the video.
I hope you try making this little album.
It is easy to make, a good size and can be changed and embellished in so many ways.

Till next time
Stay safe
Hugs
Julie


