Happy weekend days are definitely getting shorter and colder we pruned back a lot of garden ready for winter was just was just about to prune a branch off until we saw a birds nest with the bird sitting in it best come back to that one later on. this leads me to Sonai's two awesome projects
Welcome back Sonai
The bird feeder will be coming out from retirement after this great inspiration
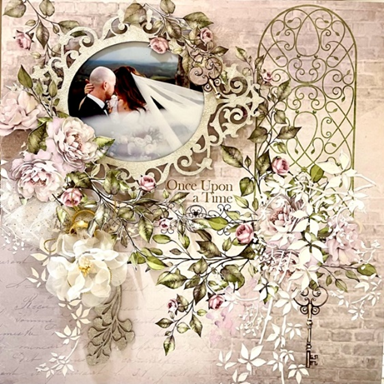
Bird Feeder here we come. This month I have made a X-large tag using some paper from the Elegance Paper Pack and the flat birder feeder chipboard.
I covered the tag with Chic paper using the left-hand side. Then I started to complete all the other components I would need.
For the bird feeder I painted the building in blue and stippled a little cream paint on to make some texture. Once this was done I used 49 and Market Blendables 01 over top. I made my own galvanized iron paper which I mounted and attached to the roof section of the Bird Feeder.
From the Style sheet of paper, I cut the blue flowers out and from the 49 & Market Botanical Laser cut elements I picked out some flowers and butterfly’s I wanted to use as well as the fence. Behind the fence I stuck several layers of mounting as I new I would need this once I assembled everything together.
Chipboard blessings, I used the word Blessings from the collection and covered with Nuvo Embellishment Mouse in Seaspray Green and Cornflower Blue. Blending the two colours together in the middle. (Nuvo and 49 & Market Products also purchased from Denise Boddey Designs).
I made a little resin bird and painted him up and found some wonderful leaf lace that Denise had died to use in my background as well.
Construction. I stuck house down first followed by the piece of lace across the front. I then had a play with my cut elements and fussy cut flowers to decide how I wanted to place them. I layered them attaching the pieces I wanted flat first and then slowly mounting the rest up. Finally, I added the wording, butterfly’s and the little blue bird.
Welcome back Sonai
The bird feeder will be coming out from retirement after this great inspiration
Bird Feeder here we come. This month I have made a X-large tag using some paper from the Elegance Paper Pack and the flat birder feeder chipboard.
I covered the tag with Chic paper using the left-hand side. Then I started to complete all the other components I would need.
For the bird feeder I painted the building in blue and stippled a little cream paint on to make some texture. Once this was done I used 49 and Market Blendables 01 over top. I made my own galvanized iron paper which I mounted and attached to the roof section of the Bird Feeder.
From the Style sheet of paper, I cut the blue flowers out and from the 49 & Market Botanical Laser cut elements I picked out some flowers and butterfly’s I wanted to use as well as the fence. Behind the fence I stuck several layers of mounting as I new I would need this once I assembled everything together.
Chipboard blessings, I used the word Blessings from the collection and covered with Nuvo Embellishment Mouse in Seaspray Green and Cornflower Blue. Blending the two colours together in the middle. (Nuvo and 49 & Market Products also purchased from Denise Boddey Designs).
I made a little resin bird and painted him up and found some wonderful leaf lace that Denise had died to use in my background as well.
Construction. I stuck house down first followed by the piece of lace across the front. I then had a play with my cut elements and fussy cut flowers to decide how I wanted to place them. I layered them attaching the pieces I wanted flat first and then slowly mounting the rest up. Finally, I added the wording, butterfly’s and the little blue bird.


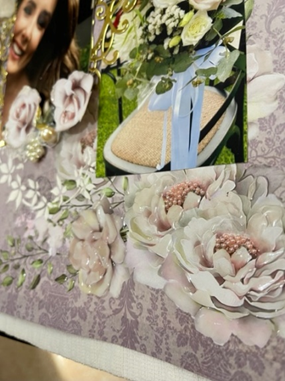
Some time ago Denise also had a bird feeder that was 3D which I still had in my stash. I already had my ideas of using bark from my garden as the roof and I knew I wanted to attached it to some wood. 3D is a little harder to construct as you have to have patience for the glue drying time and my roof in the end did not line up on one side for the chipboard hole however because I was covering it with the bark it didn’t matter. I loved adding lots of other fun elements including gum nuts and dried leaves also from my garden. I have included some pictures for you to see what it ended up looking like.


.jpg)

thanks Sonia
and thanks for dropping by