Today we get to welcome Sharon onto the blog today
with two beautiful layouts using the Storybook Collection papers
Sharon Himmighofer
Sharon Himmighofer @ Vintage Book Décor
Double Layout – using these beautiful
Day Dream Papers The colour has come through darker on the finished pages, but
it is more the grey colour as below.
Starting with the first Layout -
Select a delicate stencil using gesso
or white paint to add some softness and dimension on the page.
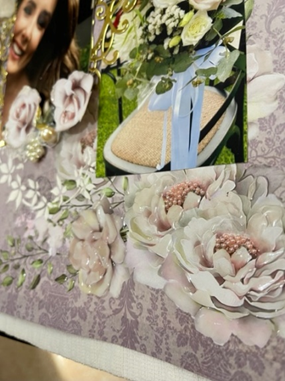
Using the Denise Boddey Die – Deco half circle, cut two using gold cardstock. Saving the little pieces to use as decorative little leaves on your page.
Select a piece of desired chipboard, paint with a Lavender shade and glue to paper.
Attach adhesive tape to the back and front of the die cuts and place under your selected photo, view photo below as a guide.
I have used an extra sheet of paper to fussy cut more flowers, leaves and a crown. I used foam tape for all my photos and fussy cut images.
Add your fussy cut flowers to the top right corner of your main photo, using a split pin add a metal word (optional) into the crown and glue down.
Using a very light white lace gather and tuck under these flowers and glue down.
I added rose gold glitter glue to the crown, just to add character. I used the little pink pearls in the centre of the flowers with glossy accents.
I finished the flowers with glossy accents and added some on the leaves. Looking at the finished page I have added some pearls from my stash to the bottom of the main featured photo (optional)
To finish the top left side, I added more fussy cut flowers and leaves. I added 2 white flowers, any you have will be fine. I added dimension letting the leaves drape into the white flowers. I added the Fairytale word with foam tape and just added some gloss accents to the letter F. I tucked a heart embellishment under my fussy cut flowers.
Now for Layout Page 2
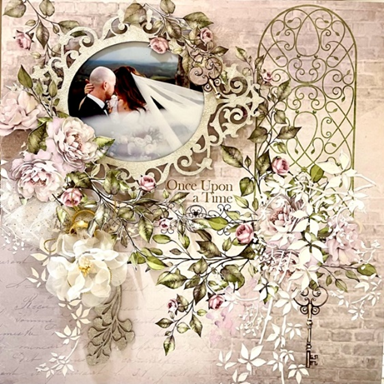
Once again I used another sheet for fussy cutting, I love the leaves on this page, flowing and soft.
I also used the same stencil just letting the leaves flow down the page.
I used an oval chipboard, white paint and embossed using a luxurious sparkle. I also used a little chipboard leaf, emboss for later.
Add your photo and position at the top left side, add your frame using foam tape. I decorated the frame with the fussy cut roses and flowers. Add your leaves trailing downwards and only glue a few down.
Gather some tulle with a dab of hot glue and place under the flowers at the bottom of the frame.
I added two Wedding Rings which I purchased from a cheap shop. I tied the rings together with some gold twine, tie a bow and leave the rest to place between the leaves. Just tuck them under the leaves.
I placed one white flower at the end of the rings, allow your leaves to spread over this flower and finally you can tuck the embossed chipboard leaves under the flower as per photo.
Add glossy accents to some leaves and roses.
I added more glossy accents to place my little pink pearls inside the flowers and finished with adding more glossy accents to a few flowers near the tulle.
Thank you
for viewing and happy crafting.
here is a link to Sharon's Facebook page drop on by for some more inspiration


No comments:
Post a Comment