September 24, 2023

Today we welcome Tina back to the blog with her entomology tag


 Happy Sunday everyone. 

For today's project I started with the clear entomology tag kit. 


  • I only used 3 of the butterflies supplied in the kit. 
  • I painted the tag in teal and navy as well as adding some stenciling. 
  • I layered up cutouts from the Christmas sheets along with leaves cut from various papers using Denise's dies.
  •  I layered in some 49 and market acetate leaves 


  • I embossed down the centre of the butterflies, then painted them and added waxes.
  •  lastly I coloured white flowers and layered them all together. 


When using these tags, as they are clear you need to be aware of the back as they can been seen from both sides. As this is going on a wall I wasn't too concerned. Although looking at the tag it would be easy to add a few bits and it could be used from either side.  

Thank  you for stopping by!


September 17, 2023

Dreams

 Well spring is warming up here in Adelaide we wake to the sound of chirping birds  very busy in our trees. Happy Sunday everyone hope you are having a lovely day 
Today we welcome Debra back to showcase her layered delight


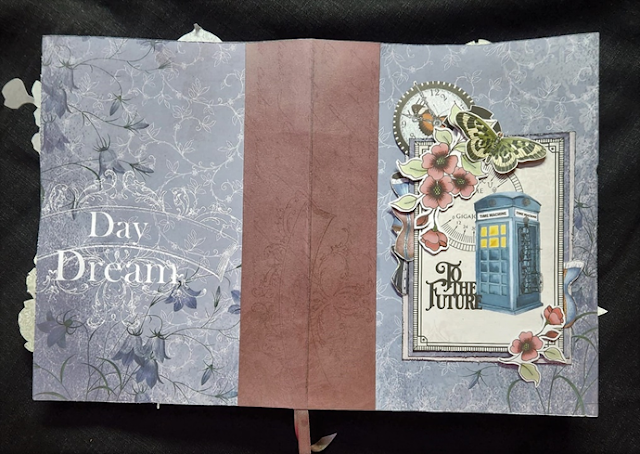
Another layout with lots of fussy cutting, using the beautiful Daydream Story Book Collection.
Layers of die cuts and fussy cut pieces were used to create my layout. I added extra beads etc. to the
background, Leaves have been coloured with stickles and Extra flowers have been added


Thank you for dropping by hope you liked my layout


Debra


September 10, 2023

Enjoying Christmas


Happy Sunday Everyone hope you are able to grab a little sunshine today as spring has decided to bless us again with a lovely day here in Adelaide
this morning we get to welcome Sharon back with her Christmas layout 
Yes time to start thinking Christmas


CHRISTMAS LAYOUT

DESIGN TEAM DENISE BODDEY DESIGNS

NEW CHRISTMAS EPHEMERA


This sweet layout is a very relaxed page to do as I focused on the beautiful new ephemera.

1.   Choose one of Denise’s papers that display your style and compliment your photos. I embossed the top left corner with a Christmas theme, it is hard to photograph but it looks good.

2.   After choosing your photo cut 3 larger pieces about half inch larger than your photo. Angle them a little leaving the photo straight on your page. I used some gold twine at the bottom of the left side of the photo and tied a bow. View below images.

 Embossing in the top left corner.


   My chosen paper.


Play with your photo and layer sheets with foam tape and glue. Tie the twine at the bottom of all these papers and finish with a bow and add to your chosen paper.


 View of the gold twine bow.

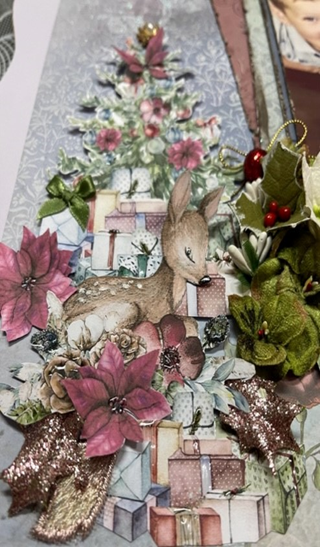
3.   I did lots of fussy cutting using the Christmas Tree, Ute, Christmas boxed presents, Flowers & a Bow.

4.   I added the Christmas Tree to the left of my photo, view image. I added lots of boxed presents, the beautiful Deer, flowers and a few bling leaves from my stash. Then I added the Ute under the photo of my Grandson leaving room to fill the back of your Ute with ephemera, I used flowers, boxed presents and a large bow.

5.   I finished with adding Glossy Accents to my Christmas Tree as we always need Christmas bling and also to areas I wanted to highlight.


Layer your fussy cutting to enhance your photo or hopefully my layout has inspired you. 


Smiles.
 thanks for visiting 


September 3, 2023

Beautiful Balloon

 Good Morning 

hope this finds you well and having lovely day with your family  honoring the dads in your life. Well spring has definitely made a great entrance here in Adelaide my garden is showing off its delights and the Bees are very busy.

Today we get to welcome Julie to the blog with an Acrylic tag and of course her fantastic tutorials.


Good morning.

Today I am using one of the beautiful Acrylic tags from Denise's shop
You will find her store here

I have also used one of the gorgeous hot air balloon chipboard pieces Denise makes.
This is the medium size 15cm high.


I have die cut a Poinsettia, a Primrose and some Leaves 
from an assortment of Denise's patterned papers.


I have added a layer of lace to the tag before adding fussy cuts
from Denise's Topper packs and the die cut flowers.


Here is my video if you would like to see how I embellished this gorgeous tag.

As always
Thank you for joining me here today
Till next time
Have fun and stay safe
Hugs
Julie

Thanks for Visiting  and don't forget to click the link to watch Julies tutorial


August 27, 2023

A Good Book

 Hello  Everyone hope this finds you well, today we are sharing an awesome Project from Sonia just love it 

As I have been working on some books my self I can appreciate  the amount of love and time that Sonia has spent fussy cutting for this project. 


A good book in hand and a coffee near buy brings joy to my heart. I have always loved reading and making books as beautiful gifts for friends is also a favourite thing of mine to do.
 
When I saw Denises’s paper collection ‘Cogs of Time’ I new it was perfect for another book but this time I wanted to make it a lot bigger than I normally would. More like a real size book. So, as you will see  did.

You can use any of Denise’s papers for the book layers. It works well if you use so light and dark colours mixed together. This is what I have done. I even used papers from Denise’s different collections.
 
Cover of the book is 12” x 8”. On the 12” long size score at 6”, this is the middle of your book. I have 5 layers in total and each layer comes down by ½” each time. Second layer would be 11.5” x 7.5” and scored at 5¾” and so on for the next 3 layers.
 
Next, I really like to rough up and rip and curl paper. Just to give it a lot more interest in the layers.


I did this top left, bottom right and on the sides I did it left bottom and right top. Except for the cover piece (bottom layer). I also used a silver paint pen around the edges of the paper.
 
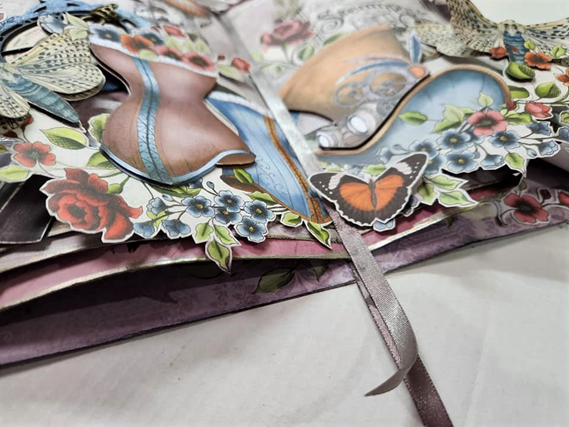
Shaping the pages makes the book look more relistic I have a very small rolling pin that I wrap my paper around from centre out to create shape before I stick my book together.  Then I stick the spine of the book together. I do like to use a piece of ribbon, lace through the middle as well. This get attached to the second layer before I attach to the cover at the back only at this stage. Once all layers are attached and dried, I move on to holding the book shape in place.


To do this I stick the second page to the cover to hold the shape, glue is near the edge of the paper. I do this one side at a time as you need to hand hold until the glue holds.
 
As I go up the layers, I put the glue further back in toward the centre so I can slide bits and pieces in between the pages of my book. See below, top right of picture.


Now it’s time to fussy cut to your hearts content.
Cogs of Time
Elements – I cut out cogs, butterflies, blue moths, light bulb, and flowers.
Travelling in Style – Circle on left hand side became the face of my chipboard clock, bottom section was spread across the whole bottom section of the book. I cut a second pink corset, hat and two moths to layer up with.
Postcards – Steampunk Time panel is the cover of my book. Corsets from centre panel also used on front of book, Binoculars used inside book, hot air balloons inside book. So, I think you get the idea. You can use any pictures you like.
Cover of Book I added a strip of cardboard to give the appearance of a spine. You can also use fabric, leather, lace for this.


 hope this is has truly been inspiration for you 
thanks for taking the time to visit


August 13, 2023

Tina's beautiful blue

 Happy Sunday hope this finds you well Tina is back today sharing a lovely layered layout she has created


Products used:


Deco half circle die
Delicate branch die
Gift of love chipboard
Herbs chipboard
leaves die
overcast paper - from Cogs of time
Chic - from elegance
various papers for layering
other products from shop
49 and market blossom rub ons


I took the overcast paper and added some rub ons.  I love the way the rub-ons meld into the paper. 


Layered some papers. Cut out and pulled apart some of the dies to add to my layers.


Punched out and made my own flowers.


  Coloured my chipboard with shimmer dusts. Punched out some  butterflies. Lastly I added some gold splatters. 
Thank you for stopping by.