February 27, 2022

Take time to Create moments

 Today we get to welcome Trish to the blog


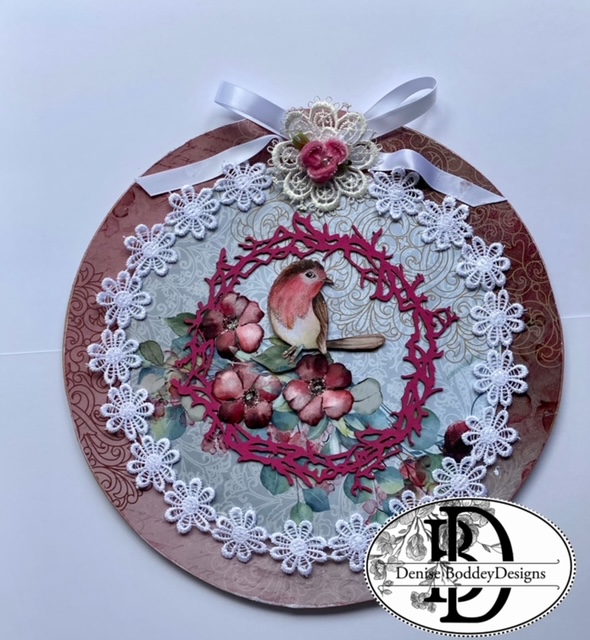
Trish has created a beautiful set of cards combined with lace and chipboard


February 20, 2022

A day of Dreams

 Good Morning

We are running a little late with our post today when you are in the throws of creativity time gets lost.

This beautiful fresh quiet Sunday morning we get to welcome Theresa Kamp to the blog today.

Welcome Theresa


Theresa has created and utilized the Chic paper beautifully in her page/canvas 

and here are her step by step pictures 


thankyou Theresa for this beautiful canvas 


February 13, 2022

Dimensional Reverse Canvas

Happy Sunday and good morning 

On this beautiful warm Sunday morning, we get to welcome back Leanne with a gorgeous off the page project

Leanne has taken the time to document her progress to achieve her finished result so keep on scrolling

If you would like to see more off Leanne' lovely projects she creates here is her blog link Leanne


Hello everyone,

Leanne here with you today and I am delighted to be sharing my first Design Team post for Denise Boddey Design Blog and Facebook page (DBD Share and Inspire group)

I have created a reverse canvas using the 3D card topper A4 sheet called: Out in My Garden set 1
from the Le Jardin Romantique Collection

So let's create:
Paint the reverse side of a canvas and allow it to dry.

Fussy cut each piece from the A4 card topper sheet.


Next using foam tape, layer each piece to the main image before adhering the whole piece to the canvas.

 prep the following chipboard pieces. I applied black acrylic paint.

Chipboard: Deco Tab Half Circle
                    Ornate Trim 
                    Ali Lattice panel ( I have cut in half )

To create an aged look for the above chipboard I applied some gold, copper and bronze wax
over the black acrylic paint.


Next paint the Botanical Leaves with gold acrylic paint.


Then glue each chipboard piece in place as shown.


Denise Boddey Products used:
                                                       3D Card Topper A4 sheet Out in My Garden Set 1

                              Chipboard:     Ali Lattice Panel
                                                       Ornate Trim
                                                       Deco Tab Half Circle
                                                       Botanical Leaves

I hope I have inspired you to create your own reverse canvas.
Have fun creating.

Thanks Leanne for sharing your canvas 


February 6, 2022

Julies mini Album

This morning we get to welcome Julie 

She has created an awesome mini Album with a you tube tutorial a must see indeed after you have scrolled on down head on over to her tutorials 

Thank you Julie for sharing your beautiful Album


Good morning


Today I want to share a mini album I created using  Elegance patterned papers.

 The album started life as an accordion album.

I altered the album by adding a spine and assorted flaps, pockets and a hand made envelope

 You can see that video here you tube

 All of the papers have had the edges distressed using my distressing tool

and then inked with a Versa Color black ink cube.

 Each page has a top opening pocket with a photo mat.

 I have also used some velum, made some flowers using Craft Barn Stamp/Die set 

and created the tags for the album.

Lace from my stash helps to decorate the front of the album.

 Here are some photos


The papers I have used are from the:- Elegance Collection

 Grace

Style

Chic

 After the Rain

 Refined

and the chipboard is 

Delicate Branch 

Till next time

Stay Safe

Hugs

Julie


January 30, 2022

Wedding Ready

This Sunday we get to welcome Tina for the very first time  on the blog with her Wedding ready heart is full page.
You may find Tina on her Instagram page https://www.instagram.com/papertinscraping/


Hello Tina here for my very first blog post, today I have created a layout using both paper collections. 

  • I have used from The Elegance range Chic, Glory and Grace papers. from Le Jardin Romantique Enchanted floral. 
  • I have fussy cut some of the flowers, and layered papers from both ranges. 
  • I took The botanicals Leaf and painted with white gesso and then added some Finnaber waxes I pulled them apart to arrange them  around my design. 
  • I painted the chipboard title My heart is full with black gesso. I followed with painting the chipboard with pink shimmer dust and added some more waxes. 
  • I used Nuvo drops to add extra detail to the flowers and the leaves. 
  • I propped some flowers up with foam tape for dimension.  
  • I then added a doily and cheese cloth for texture along with lace hearts. 
  • I finished with some silver and pink splatters. 


regards Tina


January 23, 2022

White on White

 Happy Sunday

Today is the official day we start our Design Team journey 

the girls have already been very busy they have hit the ground running. I am so excited with how much loveliness they have created.

I will start this journey off for 2022 to share the first project 

This particular idea came from scrolling through Instagram it was a light bulb moment, unfortunately I am not even sure where and whose Instagram page I was on when this happened, as I have gone back looking for the original piece. Which means I actually cant credit it to anyone, or was it something else that gave me inspiration and it all fell into this idea, who knows how these things happen.

After this massive inspiration a quick dash down to a local shop where I have previously purchased various round Hat Boxes from, with the key element in hand for measurement. From the time the original idea happened it begins to evolve very quickly into not one idea but multiple ideas, hence I bought the shop out of this particular hat box and began the ring around for more so any shop in the south of Adelaide giving you the heads up I bought theirs too with a little help from a dear friend she knows who she is. 

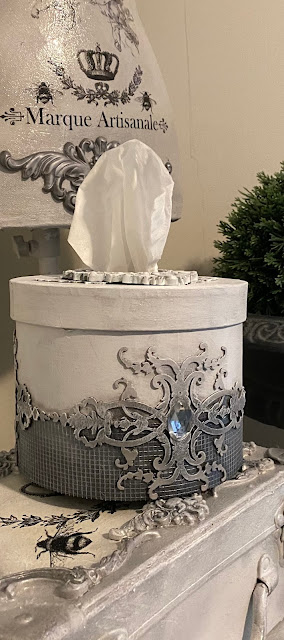
So without further rambling here is the beginning of many more of these fun Tissue boxes.


this is the piece of chipboard Romantique flourish double featured though out my projects today yes I do have the luxury of re-sizing and cutting it to fit certain display items.
On the hat/tissue box I have used the original size placed perfectly around the side
on my tray I have used a transparent white acrylic and clear and sandwiched the scrolls Romantique Flourish large together with moldings underneath to hold the sandwich together and two beautiful door knobs from my local hardware warehouse.
I have used one of my most favorite oval frames Grungy Moulds on the lid of my hat box, this is my go to mould for everything that needs something ornate and beautiful I work a lot with resin as it cures with time for me to bend it into shape if need be this I have done with my rocking horse. I find clay does not dry quick enough for what I want to achieve in the time frame I do like clay but for myself this is more practical and with little grandchildren's hands will not break if knocked over 

Well now we shared my first vision I am off to create my next two tissue boxes so I can share during the week they are already painted waiting for the chipboard to be placed on top 
stay tuned more photos to come