November 20, 2022

Blue and white Christmas


Happy Sunday

 as we are getting closer to Christmas we are starting to think more about making festive cards and if you have to mass produce you want to go with simple but stunning Julie is on the blog today with just that these two little beauties Julie has taken the time to make a video on her You Tube with the link below take a visit to find out a little more about these cards 

hop on over to the website where you will find the Poinsettia die Julie used Web site

 Good morning


Today I have got two Christmas cards to share with you, 
using Glory patterned papers from the Elegance Collection by Denise Boddey.

They are not traditional Christmas colours but I think they
work well for Christmas cards.


They are both fun fold cards.
The first is a mixture of an easel and stepper card and the second one is a gatefold card.

Full instructions for creating these cards can be found on my YouTube channel and I will put a 
link to the video at the end of this post.
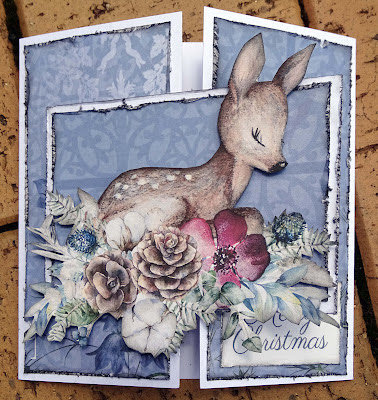

A fussy cut image from the Christmas card topper 
pack embellishes the gatefold card. Such a cute image
The card toppers come in a pack of three A4 sheets with lots of images for you to fussy cut.
I have used a Poinsettia die to create the white flowers on the first card
I have added a coat of Wink of Stella Clear and a Champagne gem 
to the centres of the Poinsettia for a bit of sparkle

Both of the cards are 5 1/4" square


Here is the link to my video you tube

Till next time
Have fun and stay safe
Hugs
Julie



October 9, 2022

Sneak peak

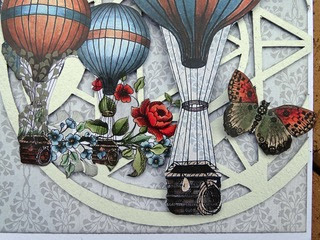
 My exciting new collection Cogs of Time coming very very soon.

Today Julie is sharing her very first play with this fun collection, this will be the first of many fun projects made with this colourful collection. 

Welcome Julie


Hi there

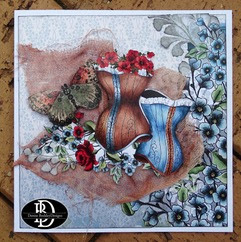
Today I am sharing two cards I created using the 
beautiful new paper range from Denise Boddey Designs.

It is called Cogs of Time and is a gorgeous steampunk range


These cards came together so easily because the papers do all of the hard work for you.

The cards are 5.25" square.

The chipboard I have used is also from the Cogs of Time range and goes with everything.

Lots of fussy cutting the beautiful images to create the focal points for my cards.

I have also included some avocado dyed gauze (cheese cloth) 
and some Wink of Stella for a little sparkle.

I will add sentiments when I decide what I will use these cards for.
I think they are suitable for any occasion.

Here is my process video


YT link

Cheers
Julie   
I hope you enjoy watching it.

October 2, 2022

Laugh Lots

Today we welcome Tina back to the blog with her layered layout 


Welcome to my latest share for Denise Boddey. 

I used a photo taken of my friend since kindergarten at my daughter's wedding

Today I have used just 2 papers from the Elegance collection, style and chic. 


I added stenciling and water colour to my base card stock.


I tore the middle out of chic. then lined it up on my paper, I then sewed the middle piece down to the cardstock

I fussy cut some flowers and clocks. 

I took the oval frame and covered with white gesso then used water colours and embossing powder I cut the frame to tuck into my layers. 

I love how this turned out! added texture and interest to the layers. 


I added some glossy agents to the flowers to give them some interest. 


I found a Charms heart in my stash, some gems, word strips and cotton. 

Lastly I finished with silver and white splatters.


September 11, 2022

kingdom of Castles

wow another week has past us again our first week of Spring and we have had some beautiful days here in Adelaide

Today we welcome Theresa on the blog sharing her lovely Castle project.


I’ve used an craft 3D frame in black as a base for this project


I am using papers from the Day Dream Story Book collection

chose a couple of border chipboard pieces


And 2 chipboard castles a small and large one

  • First step was to do the edges of the frame with papers which I distressed and inked with Bundled sage distress ink
  • I have then cut out the castle from the paper for the inside of the frame
  • I painted the castles with gesso and Nuvo waxes with added highlights on the turrets
  • I have layered the castles into the frame at different heights
  • Finished off the project with co ordinating flowers, ribbons, pearl sprigs and fussy cut leaves


thank you Theresa for sharing your project


September 4, 2022

A day with the Family

Happy Sunday and happy Fathers day and what a beautiful day here in Adelaide to celebrate the day for Fathers 

Today Tina is visiting us with her delightful page love all the little words she has used through out the page

just makes it more personal and inspiring 


Hi. Hope you weekend has been full of craft. 

For this page I started with the castle gates chipboard and altered them. I love the texture and added interest they add to the page.


I started with paper song blossom. Added layers behind my photo.


 I then added lots of fussy cut elements from various papers. 


Added some cheese cloth, a Charms Creations heart as well as white and gold splatters.  


Thank you for spending some of your crafting time with me


August 28, 2022

Good Morning hope this post finds you well. 

Julie is dropping by with another awesome project and a you tube tutorial


 Hi there

Today I am sharing a flip out page I created for my Grand-daughters 2022 album.

I am using a Uniquely Creative 8" x 10" ring bound album for this.

All of the papers I am using in this album are from Denise Boddey Designs.

The papers are double sided and a nice solid weight.

The three ranges I am using are 

Day Dream Story Book

Elegance Collection

Le Jardine Romantique


To create the flip out page I cut two pieces of 300gsm white cardstock to 7" x 9 1/2"

I scored folded one of these at 1/2" on the 7" edge.

Using liquid glue I attached the folded edge to the right hand edge of the unfolded piece, 
being sure to line the edges up.

Next I trimmed another 1/2" off of the narrower page to be sure it cleared the rings in the binder.

I cut patterned papers to cover the three top areas of the pages.

All of the papers on this page have been distressed and inked.

To create a pocket on the back of the page I used an off cut that covered the top area of the page and another off cut that was 4" high to make the pocket.
These papers received the same treatment as all of the others.

To decorate the front of the pocket I used fussy cut items from the papers and some gauze/cheese cloth.
The fussy cut items are mounted on foam squares to add extra dimension.

Using my envelope punch board and a 9 1/2" square of 
I created an envelope to go into the pocket.


I have a process video for you. At the end of the video I show you
the pages I have created so for for this album.
I hope you enjoy watching it.

Till next time
Stay safe
Hugs
Julie